How to get the Twitter OAuth 2 bearer token using Node.js
Note: There are two types of bearer tokens for twitter. OAuth 1.0 and OAuth 2.0. The OAuth 2.0 token is what you use to make your app take actions on Twitter. The OAuth 1.0 token is what you use to make your app take actions on twitter using credentials provided by your users. This writeup is about the OAuth 2.0 token.
Twitter documentation 1: Application-only authentication and OAuth 2.0 Bearer Token
Twitter documentation 2: Application-only authentication and OAuth 2.0 Bearer Token
Sign Up for Twitter
You need to sign up for twitter, if you haven’t already.
Sign Up for Twitter Developer Account
Then you need to sign up for a twitter developer account. After you sign up, you’ll need to verify your account by clicking a link that Twitter will email you. You’ll also have to provide a phone number.
Create an App
Go to the Twitter developer dashboard and create an app.
Get the ‘Consumer Key’ and the Consumer Secret’
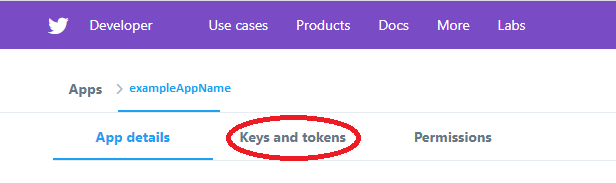
Click the ‘Details’ button for the app.

Click on ‘Keys and Tokens’.
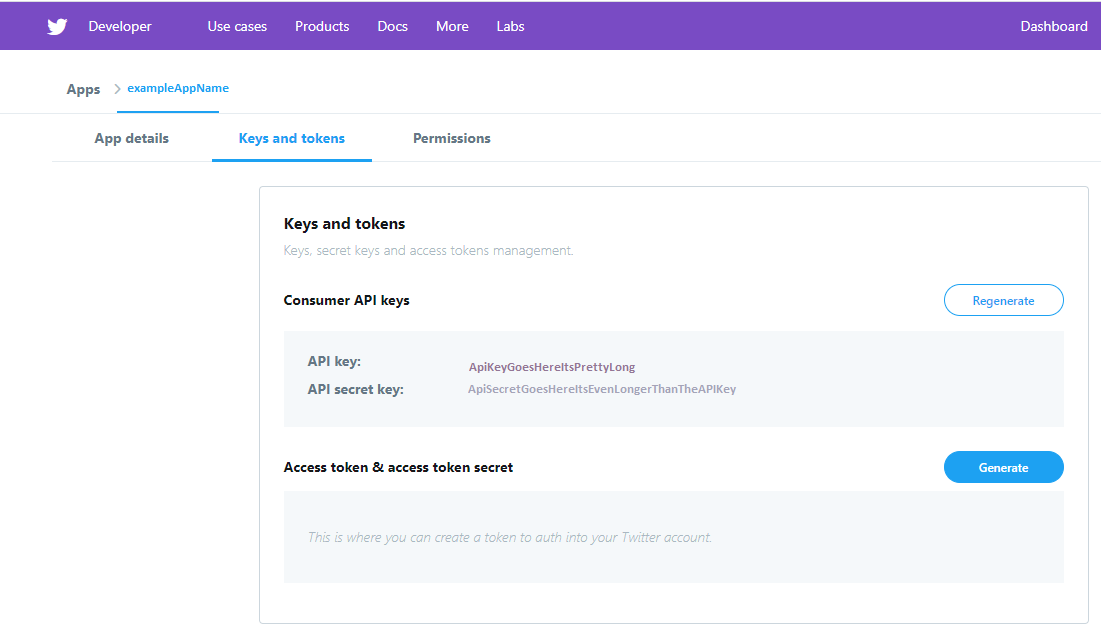
Get the consumer key and consumer secret for the app.
Make a POST request to the Twitter API for the Bearer Token
Make a POST request to the Twitter API for the bearer token. I’m using node-fetch, which is a library that lets you run window.fetch in Node.
1
2
3
4
5
6
7
8
9
10
11
12
13
14
15
16
17
18
19
20
21
22
23
24
25
26
27
28
29
30
31
32
33
34
35
36
37
38
39
40
41
blockName: getBearer
const fetch = require('node-fetch');

const twitterConsumerKey = 'xvz1evFS4wEEPTGEFPHBog';
const twitterConsumerSecret = 'L8qq9PZyRg6ieKGEKhZolGC0vJWLw8iEJ88DRdyOg';

//the consumer key 'RFC 1738 encoded'
const rfcKey = encodeURI(twitterConsumerKey);

//the consumer secret 'RFC 1738 encoded'
const rfcSecret = encodeURI(twitterConsumerSecret);

//make the bearer token credential string -
//the rfc encoded key : the rfc encoded secret
const bearerTokenCredentials = `${rfcKey}:${rfcSecret}`;

//encode the credentials to base 64
const base64BearerTokenCredentials = Buffer.from(
    bearerTokenCredentials
).toString('base64');

//create the options object for node-fetch
const options = {
    headers: {
        accept: 'gzip',

        //use your authorization string
        Authorization: 'Basic ' + base64BearerTokenCredentials,

        'content-type': 'application/x-www-form-urlencoded',
    },
    //it's a POST
    method: 'POST',
    body: 'grant_type=client_credentials',
};

const response = await fetch('https://api.twitter.com/oauth2/token', options);

const bearerToken = await response.json();

console.log(JSON.stringify(bearerToken));
Example strings from the Twitter docs
The Twitter documentation says that the key and secret need to be ‘RFC 1738 encoded’. What is RFC 1738 encoding? RFC 1738 encoding is how URLs are encoded.
Use the native encodeURI method to RFC 1738 encode the key and secret.
As the example in the Twitter documentation shows, the ‘Bearer Token credentials’ is a string containing the encoded key, a ‘:’, and the encoded secret.
The Bearer Token credentials have to be encoded into base 64 before they are sent as part of the POST request. The answers on this stackoverflow page tell you how to use the native Buffer object to encode strings into base64.
The options object for the fetch request. Defines headers, method, and body.
gzip indicates compressed data.
The OAuth 2.0 token. You have to have the string Basic first.
Tells OAuth that your application is request an access token to access its own resources, not on behalf of a user. grant_type parameter must be set to client_credentials.
Fetching is an asynchronous function. Using the await keyword means we wait until the promise resolves before assigning the value to the variable.
The json() method of the response object gives us the content of the response as a JSON object. It’s also async, so await it.
Now you have the OAuth2 bearer token for your app.
Now you have the OAuth2 bearer token for your app! Save it as a string and you can use it to make requests to the Twitter API. Make sure to treat it like a password. Keep it secret and don’t upload it to a public file or git repo.